


مقدمة
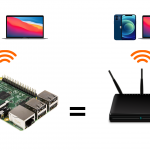
مع تطور الهواتف الذكية والتطبيقات وعالم الإتصال أصبح الآن بإمكانك التحكم في أجهزة المنزل أو العمل من خلال هاتفك، في هذا الدرس ستتعلم كيفية التحكم بالاضاءة عن طريق الراسبيري باي والتيليجرام.

المواد والأدوات

1× راسبيري باي

1× سلك (HDMI)


1× كرت ذاكرة

1× سلك ايثرنت


 1×
1× 
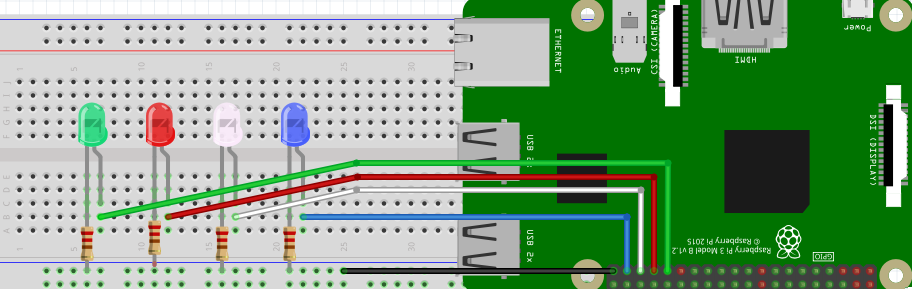
توصيل الدائرة
إنشاء بوت على التيليجرام
عليك بالبداية تنصيب برنامج التيليجرام على هاتفك أو أي جهاز لوحي تفضله Telegram.
بعد تنصيبه سجل اسمك وبياناتك ورقم هاتفك كما هو معتاد.
أنشئ بوت باسم (Geeksvalley) يتم إرسال أوامر التشغيل والاطفاء عليه بالخطوات التالية:
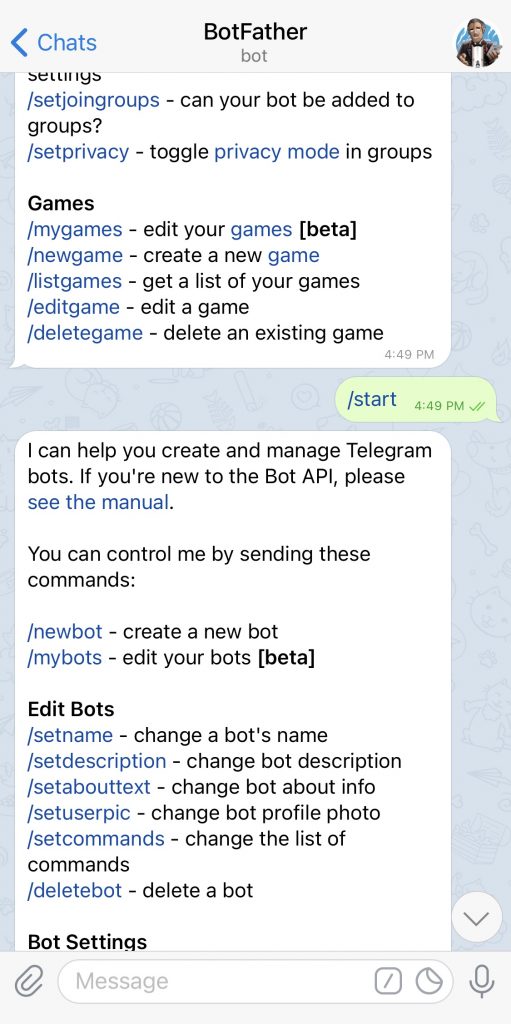
بالبداية تحتاج بوت BotFather الرسمي الخاص بالتيليجرام اكتب في صفحة البحث BotFather.

بعد ذلك اكتب رسالة start/ سيرد عليك برسالة تحتوي على جميع الأوامر التي يستطيع تنفيذها البوت.
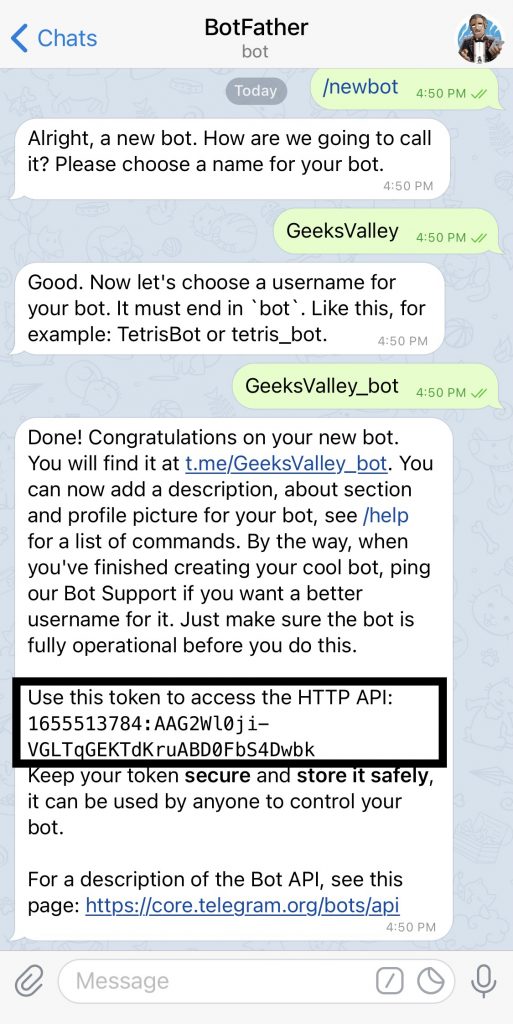
لإنشاء بوت جديد أرسل newbot/.
سيرد عليك البوت برسالة تطلب منك تسمية البوت الذي قمت بإنشائه في هذا الدرس تمت تسميته GeeksValley.
سيرد عليك البوت برسالة تطلب منك تحديد اسم المستخدم للبوت وبنهاية اسم المستخدم اكتب bot_.
هنا اسم المستخدم GeeksValley_bot.
سيتم إرسال رسالة بأنه تم انشاء البوت ويتضمن رابط HTTP API احفظ الرابط ستستخدمه عند كتابة كود المشروع على الراسبيري باي.
تهيئة الراسبيري باي
أولا، سوف تحتاج إلى تثبيت نظام الراسبيان على الراسبيري باي إذا لم تكن قد فعلت ذلك قم بالإطلاع على الدرس الأول نظام تشغيل الراسبيري باي
وبعد تثبيت النظام، يمكنك تهيئة النظام من خلال الرجوع للدرس الثاني تهيئة نظام التشغيل
افتح الشاشة السوداء LXterminal للبدء باستخدام الراسبيري باي.

للبدء، قم بإستخدام الـ Termial لتحديث الراسبيري باي إلى أحدث إصدار.
sudo apt-get update
sudo apt-get upgrade
ثم أعد تشغيل الراسبيري باي.
reboot
حمّل البايثون على الراسبيري باي.
sudo apt install python3 idle3
حمل أداة Pip.
sudo apt-get install python-pip
بعد ذلك حمّل Telepot حتى تتمكن من تكوين جسر تواصل مع برنامج التيليجرام.
sudo pip install telepot
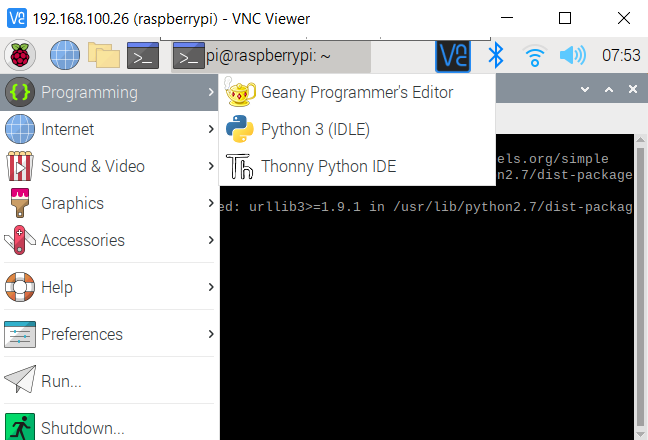
ستشاهد في قائمة Programming وجود برنامج جديد وهو Python 3 (IDLE) انقر عليه.
من قائمة File اختر New File.
انسخ الكود التالي والصقه بالملف الفارغ لكن هناك أمور مهمة عليك العمل بها قبل رفع الكود البرنامجي إلى الراسبيري باي.
import time, datetime
import RPi.GPIO as GPIO
import telepot
from telepot.loop import MessageLoop
blue = 26
white = 19
red = 13
green = 6
now = datetime.datetime.now()
GPIO.setmode(GPIO.BCM)
GPIO.setwarnings(False)
#LED blue
GPIO.setup(blue, GPIO.OUT)
GPIO.output(blue, 0) #Off initially
#LED white
GPIO.setup(white, GPIO.OUT)
GPIO.output(white, 0) #Off initially
#LED Red
GPIO.setup(red, GPIO.OUT)
GPIO.output(red, 0) #Off initially
#LED green
GPIO.setup(green, GPIO.OUT)
GPIO.output(green, 0) #Off initially
def action(msg):
chat_id = msg['chat']['id']
command = msg['text']
print ('Received: %s') % command
if 'on' in command:
message = "Turned on "
if 'blue' in command:
message = message + "blue "
GPIO.output(blue, 1)
if 'white' in command:
message = message + "white "
GPIO.output(white, 1)
if 'red' in command:
message = message + "red "
GPIO.output(red, 1)
if 'green' in command:
message = message + "green "
GPIO.output(green, 1)
if 'all' in command:
message = message + "all "
GPIO.output(blue, 1)
GPIO.output(white, 1)
GPIO.output(red, 1)
GPIO.output(green, 1)
message = message + "light(s)"
telegram_bot.sendMessage (chat_id, message)
if 'off' in command:
message = "Turned off "

if 'blue' in command:
message = message + "blue"
GPIO.output(blue, 0)
if 'white' in command:
message = message + "white "
GPIO.output(white, 0)
if 'red' in command:
message = message + "red "
GPIO.output(red, 0)
if 'green' in command:
message = message + "green "
GPIO.output(green, 0)
if 'all' in command:
message = message + "all "
GPIO.output(blue, 0)
GPIO.output(white, 0)
GPIO.output(red, 0)
GPIO.output(green, 0)
message = message + "light(s)"
telegram_bot.sendMessage (chat_id, message)
telegram_bot = telepot.Bot('1657513784:AAG2Wl0ji-VGLTqGEKTdKruABD0FbS4Dwbk')
print (telegram_bot.getMe())
MessageLoop(telegram_bot, action).run_as_thread()
print ('Up and Running....')
while 1:
time.sleep(10)
شرح الكود البرمجي
هنا نستعدي المكتبات الضرورية للنظام مثل time, datetime و RPi.GPIO و telepot.
import time, datetime
import RPi.GPIO as GPIO
import telepot
from telepot.loop import MessageLoop
في هذه الأسطر يتم تعريف المدخلات المستخدمة وهي أربعة المصباح الأخضر والأزرق والأبيض والأحمر.
blue = 26
white = 19
red = 13
green = 6
ستكون المصابيح في حالتها الابتدائية بحالة سكون.
now = datetime.datetime.now()
GPIO.setmode(GPIO.BCM)
GPIO.setwarnings(False)
#LED blue
GPIO.setup(blue, GPIO.OUT)
GPIO.output(blue, 0) #Off initially
#LED white
GPIO.setup(white, GPIO.OUT)
GPIO.output(white, 0) #Off initially
#LED Red
GPIO.setup(red, GPIO.OUT)
GPIO.output(red, 0) #Off initially
#LED green
GPIO.setup(green, GPIO.OUT)
GPIO.output(green, 0) #Off initially
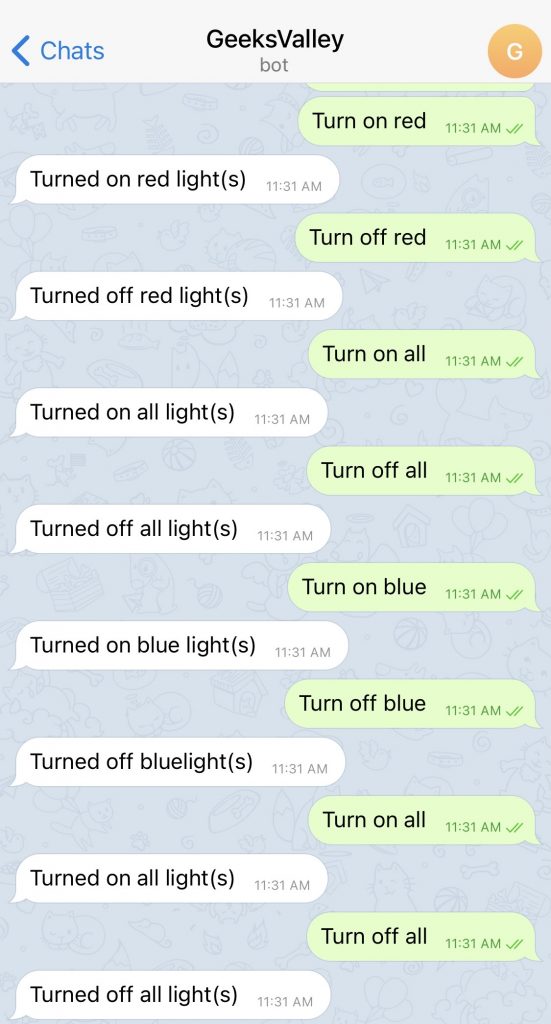
بعد ذلك يستطيع المستخدم التحكم بالاضاءة وذلك بإدخال الأوامر في برنامج التيليجرام.
سيكون أمر تشغيل المصابيح مبتدئيًا بـ Turn on متبوعًا باسم المصباح (blue, red, green or white) .
إذا كنت ترغب بتشغيل كل المصابيح بنفس الوقت (Turn on all).
والعكس صحيح أيضًا عند إيقاف أحد المصابيح أكتب Turn off متبوعًا باسم المصباح (blue, red, green or white).
إذا كنت ترغب بإيقاف كل المصابيح بنفس الوقت (Turn off all).
def action(msg):
chat_id = msg['chat']['id']
command = msg['text']
print ('Received: %s') % command
if 'on' in command:
message = "Turned on "
if 'blue' in command:
message = message + "blue "
GPIO.output(blue, 1)
if 'white' in command:
message = message + "white "
GPIO.output(white, 1)
if 'red' in command:
message = message + "red "
GPIO.output(red, 1)
if 'green' in command:
message = message + "green "
GPIO.output(green, 1)
if 'all' in command:
message = message + "all "
GPIO.output(blue, 1)
GPIO.output(white, 1)
GPIO.output(red, 1)
GPIO.output(green, 1)
message = message + "light(s)"
telegram_bot.sendMessage (chat_id, message)
if 'off' in command:
message = "Turned off "
if 'blue' in command:
message = message + "blue"
GPIO.output(blue, 0)
if 'white' in command:
message = message + "white "
GPIO.output(white, 0)
if 'red' in command:
message = message + "red "
GPIO.output(red, 0)
if 'green' in command:
message = message + "green "
GPIO.output(green, 0)
if 'all' in command:
message = message + "all "
GPIO.output(blue, 0)
GPIO.output(yellow, 0)
GPIO.output(red, 0)
GPIO.output(green, 0)
message = message + "light(s)"
هذا السطر مهم وحساس للغاية.
عليك كتابة HTTP API الخاص بالبوت الذي قمت بانشاءه.
telegram_bot = telepot.Bot('HTTP API الصق')
احفظ الملف بالمسار الافتراضي.
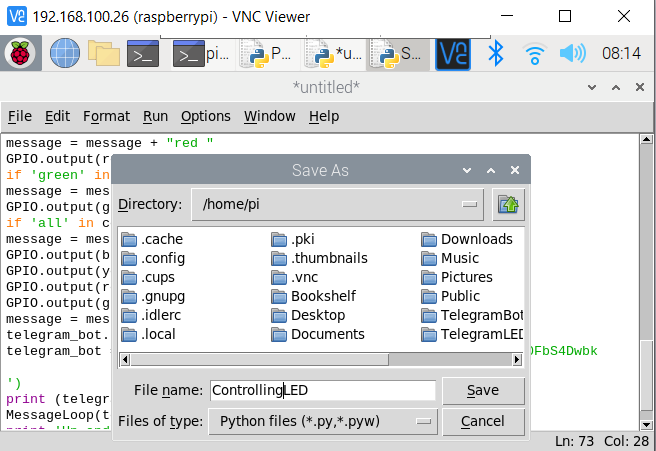
بعد ذلك افتح الشاشة السوداء LXterminal.
واكتب الأمر التالي لتنفيذ الكود البرمجي.
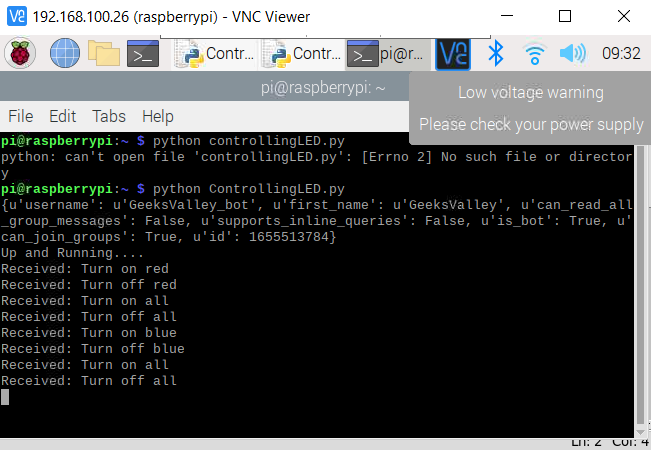
python ControllingLED.py
سيكون هناك رسالة مفادها بأن عملية اتصالك صحيحة.
سيبدأ النظام بالعمل مباشرة يمكنك إرسال رسائل من التيليجرام وستلاحظ أنها مطابقة لمخرجات الشاشة السوداء.
 |
 |
لا تنسَ فصل مصدر الطاقة بعد الانتهاء من استخدام النظام.