أولا قم بتثبيت حزمة Flask. وتأكد من أنك متصل بالانترنت، إما عن طريق Ethernet Cable أو عن طريق WIFI قبل أن تبدأ.
قم بكتابة الأمر التالي على نافذة Terminal لتثبيت الـ Flask :
sudo apt-get install python3-flask
جزء البرمجة في هذا المشروع يلعب دورا هاما للغاية لأداء جميع العمليات. أولا وقبل كل شي نحن بحاجة إلى درج المكتبات المطلوبة لـ Flask .ثم تهيئة المتغييرات و تحديد Pins لشاشة الكريستال السائل (LCD) .
from flask import Flask
from flask import render_template, request
import RPi.GPIO as GPIO
import time
app = Flask(__name__)

# Define GPIO to LCD mapping
LCD_RS = 7
LCD_E = 8
LCD_D4 = 25
LCD_D5 = 24
LCD_D6 = 23
LCD_D7 = 18
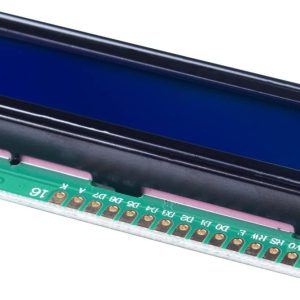
لبرمجة شاشة الكريستال السائل (LCD) ، يتم إنشاء الدالة ()lcd_init لتهيئة شاشة LCD.
def lcd_init():
# Initialise display
  lcd_byte(0x33,LCD_CMD) # 110011 Initialise
  lcd_byte(0x32,LCD_CMD) # 110010 Initialise
  lcd_byte(0x06,LCD_CMD) # 000110 Cursor move direction
  lcd_byte(0x0C,LCD_CMD) # 001100 Display On,Cursor Off, Blink Off
  lcd_byte(0x28,LCD_CMD) # 101000 Data length, number of lines, font size
  lcd_byte(0x01,LCD_CMD) # 000001 Clear display
  time.sleep(E_DELAY)
و الداله ()lcd_byte لإرسال الأوامر إلى الشاشة، , و الداله ()lcd_string لإرسال البيانات المراد عرضها على الشاشة إلى الـ LCD .
def lcd_string(message,line):
# Send string to display
  message = message.ljust(LCD_WIDTH," ")
  lcd_byte(line, LCD_CMD)
  for i in range(LCD_WIDTH):
     lcd_byte(ord(message[i]),LCD_CHR)
و فيما يلي هذا الجزء من البرنامج يستخدم لإرسال رسالة من متصفح ويب إلى الراسبيري باي بإستخدام Flask .
@app.route("/")
def index():
   return render_template('index.html')
@app.route("/change", methods=['POST'])
def change():
  if request.method == 'POST':
    # Getting the value from the webpage
    data1 = request.form['lcd']
    print ("---Message is", data1)
    lcd_string(data1,LCD_LINE_1)
  return render_template('index.html', value=data1)
if __name__ == "__main__":
  app.debug = True
  app.run('192.168.1.19', port=8080,debug=True)
قم بكتابة الكود البرمجي كاملا كالتالي :
#import
from flask import Flask
from flask import render_template, request
import RPi.GPIO as GPIO
import time
app = Flask(__name__)

# Define GPIO to LCD mapping
LCD_RS = 7
LCD_E  = 8
LCD_D4 = 25
LCD_D5 = 24
LCD_D6 = 23
LCD_D7 = 18


# Define some device constants
LCD_WIDTH = 16    # Maximum characters per line
LCD_CHR = True
LCD_CMD = False

LCD_LINE_1 = 0x80 # LCD RAM address for the 1st line
LCD_LINE_2 = 0xC0 # LCD RAM address for the 2nd line

# Timing constants
E_PULSE = 0.0005
E_DELAY = 0.0005
GPIO.setwarnings(False)
GPIO.setmode(GPIO.BCM)       # Use BCM GPIO numbers
GPIO.setup(LCD_E, GPIO.OUT)  # E
GPIO.setup(LCD_RS, GPIO.OUT) # RS
GPIO.setup(LCD_D4, GPIO.OUT) # DB4
GPIO.setup(LCD_D5, GPIO.OUT) # DB5
GPIO.setup(LCD_D6, GPIO.OUT) # DB6
GPIO.setup(LCD_D7, GPIO.OUT) # DB7


def lcd_init():
  # Initialise display
  lcd_byte(0x33,LCD_CMD) # 110011 Initialise
  lcd_byte(0x32,LCD_CMD) # 110010 Initialise
  lcd_byte(0x06,LCD_CMD) # 000110 Cursor move direction
  lcd_byte(0x0C,LCD_CMD) # 001100 Display On,Cursor Off, Blink Off
  lcd_byte(0x28,LCD_CMD) # 101000 Data length, number of lines, font size
  lcd_byte(0x01,LCD_CMD) # 000001 Clear display
  time.sleep(E_DELAY)

def lcd_byte(bits, mode):
  # Send byte to data pins
  # bits = data
  # mode = True  for character
  #        False for command

  GPIO.output(LCD_RS, mode) # RS

  # High bits
  GPIO.output(LCD_D4, False)
  GPIO.output(LCD_D5, False)
  GPIO.output(LCD_D6, False)
  GPIO.output(LCD_D7, False)
  if bits&0x10==0x10:
    GPIO.output(LCD_D4, True)
  if bits&0x20==0x20:
    GPIO.output(LCD_D5, True)
  if bits&0x40==0x40:
    GPIO.output(LCD_D6, True)
  if bits&0x80==0x80:
    GPIO.output(LCD_D7, True)

  # Toggle 'Enable' pin
  lcd_toggle_enable()

  # Low bits
  GPIO.output(LCD_D4, False)
  GPIO.output(LCD_D5, False)
  GPIO.output(LCD_D6, False)
  GPIO.output(LCD_D7, False)
  if bits&0x01==0x01:
    GPIO.output(LCD_D4, True)
  if bits&0x02==0x02:
    GPIO.output(LCD_D5, True)
  if bits&0x04==0x04:
    GPIO.output(LCD_D6, True)
  if bits&0x08==0x08:
    GPIO.output(LCD_D7, True)

  # Toggle 'Enable' pin
  lcd_toggle_enable()

def lcd_toggle_enable():
  # Toggle enable
  time.sleep(E_DELAY)
  GPIO.output(LCD_E, True)
  time.sleep(E_PULSE)
  GPIO.output(LCD_E, False)
  time.sleep(E_DELAY)

def lcd_string(message,line):
  # Send string to display
  message = message.ljust(LCD_WIDTH," ")

  lcd_byte(line, LCD_CMD)

  for i in range(LCD_WIDTH):
    lcd_byte(ord(message[i]),LCD_CHR)

lcd_init()
lcd_string("Rasbperry Pi",LCD_LINE_1)


@app.route("/")
def index():
    return render_template('index.html')
@app.route("/change", methods=['POST'])
def change():
 if request.method == 'POST':
    # Getting the value from the webpage
   data1 = request.form['lcd']
   print ("---Message is", data1)
   lcd_string(data1,LCD_LINE_1)

 return render_template('index.html', value=data1)
if __name__ == "__main__":
    app.debug = True
    app.run('192.168.1.19', port=8080,debug=True)
قم بحفظ ملف الكود app.py داخل ملف webapp الذي تم إنشاءه مسبقا. flask سوف يقوم بالبحث عن index.html في ملف templates، الموجود على نفس الملف الذي يحتوي ملف الكود app.py .
بعد ذلك يمكنك تشغيل برنامج البايثون ولكن قبل ذلك تحتاج إلى استبدال عنوان IP في برنامج مع عنوان IP للراسبيري باي الخاصه بك.يمكنك التحقق من عنوان IP عن طريق كتابة الامر التالي على نافذة terminal :
Ifconfig
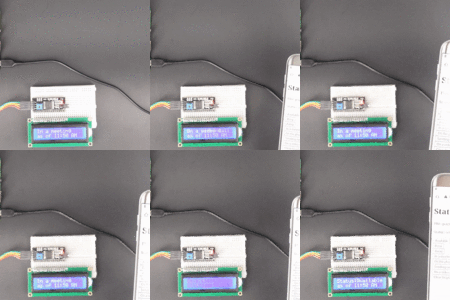
بعد تشغيل كود البايثون ثم بفتح http://IP_address_of_your_Pi:8080 في متصفح الويب و ادخل الرسالة ثم انقر فوق زر الارسال .

