مقدمة
تساعد كلمة المرور لجهاز الحاسوب في الحفاظ على بياناتك وخصوصية جهازك، في هذا الدرس ستتعلم كيفية تسجيل الدخول لنظام ويندوز باستخدام الاردوينو وقارئ البطاقات في حال كنت لا ترغب في إدخال كلمة عند تسجيل الدخول.

المواد والأدوات
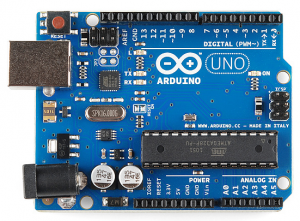
1× اردوينو اونو
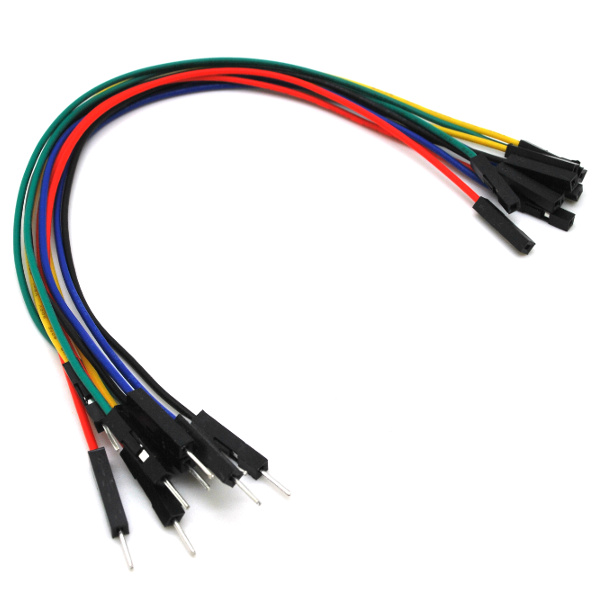
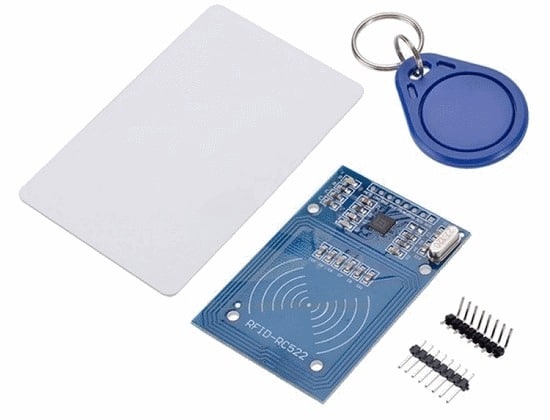
1× قارئ البطاقة (RFID mfrc522)
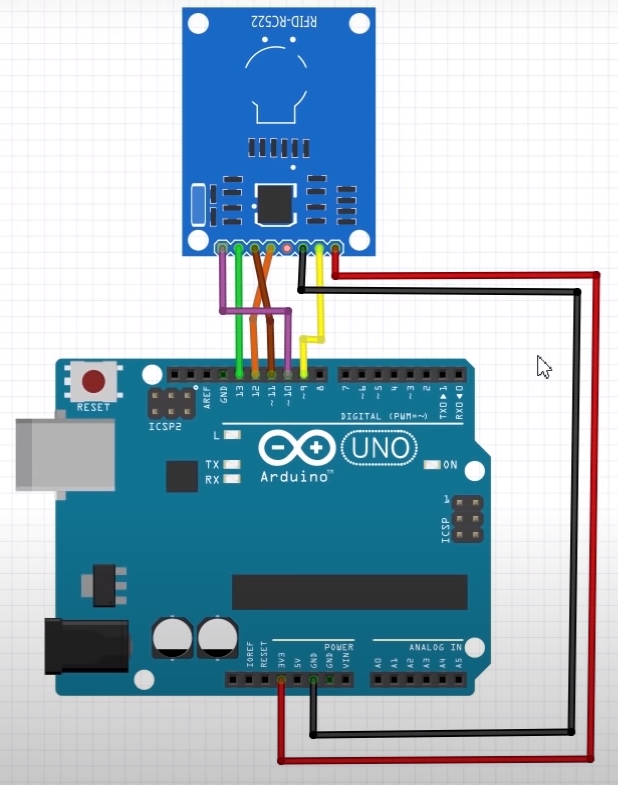
توصيل الدائرة
وصل الدائرة كما هو موضح بالشكل:

لمعرفة المزيد حول بطاقة RFID يمكنك الرجوع للدرس RFID
الكود البرمجي
في البداية عليك تثبيت المكتبة الخاصة بقارئ البطاقات RFID انقر على الرابط التالي RFID-master وحملها على جهازك.
1- قراءة رمز البطاقة
حتى تتمكن من تسجيل الدخول لنظام ويندوز باستخدام الاردوينو و (RFID) ارفع الكود البرمجي التالي على لوحة الاردوينو.
#include <SPI.h>
#include <MFRC522.h> // RFID library
#define SS_PIN 10 //RX slave select
#define RST_PIN 9
int gled = 7; // optional
int rled = 4;// optional
MFRC522 mfrc522(SS_PIN, RST_PIN); // Create MFRC522 instance.
String card_ID=""; //
String password="" ; // Change It To Your Windows / fb / any Account's Password
String rfid="";// UID (unique Id Code Of Your Rfid Tag)
void setup() {
Serial.begin(9600); // Initialize serial communications with the PC
SPI.begin(); // Init SPI bus
mfrc522.PCD_Init(); // Init MFRC522 card
pinMode(gled,OUTPUT);
pinMode(rled,OUTPUT);
}
void loop() {
//look for new card
if ( ! mfrc522.PICC_IsNewCardPresent()) {
return;
}
if ( ! mfrc522.PICC_ReadCardSerial()) {
return;//if read card serial(0) returns 1, the uid struct contians the ID of the read card.
}
for (byte i = 0; i < mfrc522.uid.size; i++) {
card_ID += mfrc522.uid.uidByte[i];
}
// Serial.println(card_ID);
Serial.print(card_ID);
delay(1000);
card_ID="";
}
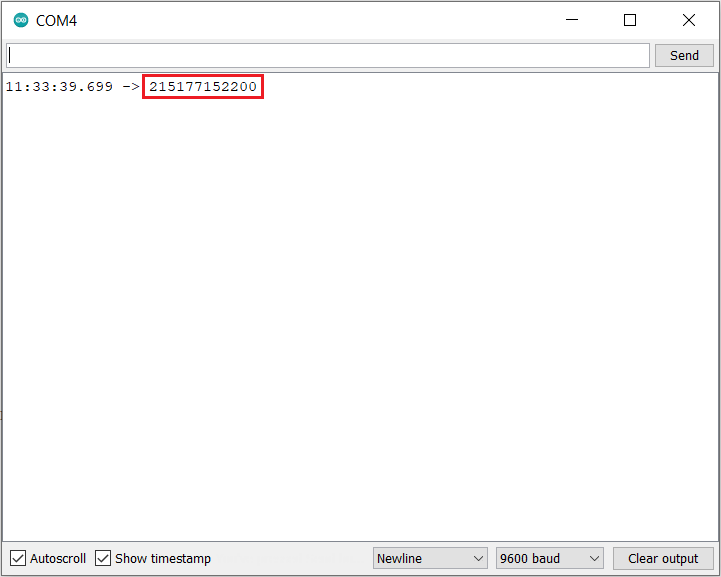
افتح شاشة الاتصال التسلسلي وضع البطاقة على قارئ البطاقات.
انسخ رمز البطاقة واحفظه في ملف ستحتاج إليه لاحقًا.
2- رفع الكود البرمجي لنظام
قبل رفع الكود البرمجي إلى لوحة الاردوينو هناك أمور مهمة عليك العمل بها، اقرأ شرح الكود البرمجي.
uint8_t buf[8] = { 0 };
#include <SPI.h>
#include <MFRC522.h> // RFID library
#define SS_PIN 10 //RX slave select
#define RST_PIN 9
int gled = 7; // optional
int rled = 4;// optional
MFRC522 mfrc522(SS_PIN, RST_PIN); // Create MFRC522 instance.
String card_ID=""; //
String password="" ; // Change It To Your Windows / fb / any Account's Password
String rfid="";// UID (unique Id Code Of Your Rfid Tag)
void setup() {
Serial.begin(9600); // Initialize serial communications with the PC
SPI.begin(); // Init SPI bus
mfrc522.PCD_Init(); // Init MFRC522 card
pinMode(gled,OUTPUT);
pinMode(rled,OUTPUT);
}
void loop() {
//look for new card
if ( ! mfrc522.PICC_IsNewCardPresent()) {
return;
}
if ( ! mfrc522.PICC_ReadCardSerial()) {
return;//if read card serial(0) returns 1, the uid struct contains the ID of the read card.
}
for (byte i = 0; i < mfrc522.uid.size; i++) {
card_ID += mfrc522.uid.uidByte[i];
}
// Serial.println(card_ID);
if(card_ID==rfid){digitalWrite(gled,HIGH);
typeLiteralString(password);
pressKey("enter"); releaseKey("enter");
digitalWrite(gled,LOW); delay(200);digitalWrite(gled,HIGH); delay(200);digitalWrite(gled,LOW);
}
if(card_ID!=password){
digitalWrite(rled,HIGH); digitalWrite(rled,LOW); delay(200);digitalWrite(rled,HIGH); delay(200);digitalWrite(rled,LOW); } else{ goto cont;}
delay(1000);
cont:
delay(1000);
card_ID="";
}
boolean isModifier(int keycode) {
boolean result = false;
if (keycode >= 224 && keycode <= 231) { // if the keycode is a modifier key
result = true;
}
return result;
}
void pressModifier(String keyname) {
pressModifier(getKeycode(keyname));
}
void pressModifier(int keycode) {
int modifiermask = 0;
if (isModifier(keycode)) { // if the keycode represents a modifier key
modifiermask = getModifierMask(keycode);
buf[0] = buf[0] | modifiermask;
Serial.write(buf, 8); // Send key report
}
}
void releaseModifier(String keyname) {
releaseModifier(getKeycode(keyname));
}
void releaseModifier(int keycode) {
int modifiermask = 0;
if (isModifier(keycode)) { // if the keycode represents a modifier key
modifiermask = getModifierMask(keycode);
buf[0] = buf[0] & (~modifiermask);
Serial.write(buf, 8); // Send key report
}
}
void releaseAllModifiers() {
buf[0] = B00000000;
Serial.write(buf, 8); // Send key report
}
void pressKey(String keyname) {
pressKey(getKeycode(keyname));
}
void pressKey(int keycode) { // TODO: cycle the 6 key spots in the report buffer instead of just using buf[2] each time.
buf[2] = keycode;
Serial.write(buf, 8); // Send key report
}
void releaseKey(String keyname) {
releaseKey(getKeycode(keyname));
}
void releaseKey(int keycode) {
// find the keycode in the report buffer, then set it to zero.
int i=0;
for (i=2; i<8; i++) {
if (buf[i] == keycode) {
buf[i] = 0;
}
}
Serial.write(buf, 8); // Send key report
}
void releaseAllKeys() {
int i=0;
for (i=2; i<8; i++) {
buf[i] = 0;
}
Serial.write(buf, 8); // Send key report
}
void pressSequenceOfKeys(const char * keySequence[], int numberOfKeys) {
// This function can be good for pressing a few keys while holding a modifier down for example.
int i = 0;
for (i=0; i<numberOfKeys; i++) {
pressKey(keySequence[i]);
releaseKey(keySequence[i]);
}
}
void typeLiteralString(String string) {
char charArray[string.length()+1];
string.toCharArray(charArray, string.length()+1);
typeLiteralString(charArray, string.length());
}
void typeLiteralString(char string[], int stringLength) { // stringLength is the length of the printable string without considering the null byte.
// This function will type the given string exactly as given, automatically pressing left_shift where necessary for capitals and symbols.
// just in case:
releaseAllKeys();
releaseAllModifiers();
boolean charNeedsShift = false;
boolean shiftIsPressed = false;
int i=0;
for (i=0; i<stringLength; i++) {
charNeedsShift = characterNeedsShift(string[i]);
if (charNeedsShift && !shiftIsPressed) {
pressModifier("left_shift");
shiftIsPressed = true;
}
else if (!charNeedsShift && shiftIsPressed) {
releaseModifier("left_shift");
shiftIsPressed = false;
}
pressKey(String(string[i])); // without converting the char in string[i] to a String, arduino would prefer the pressKey(int) function instead of the pressKey(String) function, casting the char to a keycode (int) instead of a keyname (String).
releaseKey(String(string[i])); // same as previous comment, but with releaseKey().
}
releaseAllModifiers();
}
boolean characterNeedsShift(char character) {
int needsModifier = false;
if ( // look up an ascii table and this will make sense.
(character >= 33 && character <= 38)
|| (character >= 40 && character <= 43)
|| (character == 58)
|| (character == 60)
|| (character >= 62 && character <= 90)
|| (character >= 94 && character <= 95)
|| (character >= 123 && character <= 126)
) {
needsModifier = true;
}
return needsModifier;
}
int getKeycode(String keyname) {
String key = String(keyname); // Use a copy so that we don't mutate the user's String. Not sure if this is needed, but just in case. TODO: find out.
key.toLowerCase();
int keycode = 0; // keycode of zero means nothing pressed.
// non-modifier keys
if (key == "a") { keycode = 4; }
else if (key == "b") { keycode = 5; }
else if (key == "c") { keycode = 6; }
else if (key == "d") { keycode = 7; }
else if (key == "e") { keycode = 8; }
else if (key == "f") { keycode = 9; }
else if (key == "g") { keycode = 10; }
else if (key == "h") { keycode = 11; }
else if (key == "i") { keycode = 12; }
else if (key == "j") { keycode = 13; }
else if (key == "k") { keycode = 14; }
else if (key == "l") { keycode = 15; }
else if (key == "m") { keycode = 16; }
else if (key == "n") { keycode = 17; }
else if (key == "o") { keycode = 18; }
else if (key == "p") { keycode = 19; }
else if (key == "q") { keycode = 20; }
else if (key == "r") { keycode = 21; }
else if (key == "s") { keycode = 22; }
else if (key == "t") { keycode = 23; }
else if (key == "u") { keycode = 24; }
else if (key == "v") { keycode = 25; }
else if (key == "w") { keycode = 26; }
else if (key == "x") { keycode = 27; }
else if (key == "y") { keycode = 28; }
else if (key == "z") { keycode = 29; }
else if (key == "1" || key == "!") { keycode = 30; }
else if (key == "2" || key == "@") { keycode = 31; }
else if (key == "3" || key == "#") { keycode = 32; }
else if (key == "4" || key == "$") { keycode = 33; }
else if (key == "5" || key == "%") { keycode = 34; }
else if (key == "6" || key == "^") { keycode = 35; }
else if (key == "7" || key == "&") { keycode = 36; }
else if (key == "8" || key == "*") { keycode = 37; }
else if (key == "9" || key == "(") { keycode = 38; }
else if (key == "0" || key == ")") { keycode = 39; }
else if (key == "enter" || key == "return") { keycode = 40; }
else if (key == "escape" || key == "") { keycode = 41; }
else if (key == "backspace" || key == "") { keycode = 42; }
else if (key == "tab" || key == " ") { keycode = 43; }
else if (key == "space" || key == " ") { keycode = 44; }
else if (key == "-" || key == "_") { keycode = 45; }
else if (key == "=" || key == "+") { keycode = 46; }
else if (key == "[" || key == "{") { keycode = 47; }
else if (key == "]" || key == "}") { keycode = 48; }
else if (key == "\\" || key == "|") { keycode = 49; }
else if (key == ";" || key == ":") { keycode = 51; }
else if (key == "'" || key == "\"") { keycode = 52; }
else if (key == "`" || key == "~") { keycode = 53; }
else if (key == "," || key == "<") { keycode = 54; }
else if (key == "." || key == ">") { keycode = 55; }
else if (key == "/" || key == "?") { keycode = 56; }
// TODO: Fix these keycodes. V
else if (key == "capslock") { keycode = 58; }
else if (key == "f1") { keycode = 59; }
else if (key == "f2") { keycode = 60; }
else if (key == "f3") { keycode = 61; }
else if (key == "f4") { keycode = 62; }
else if (key == "f5") { keycode = 63; }
else if (key == "f6") { keycode = 64; }
else if (key == "f7") { keycode = 65; }
else if (key == "f8") { keycode = 66; }
else if (key == "f9") { keycode = 67; }
else if (key == "f10") { keycode = 68; }
else if (key == "f11") { keycode = 69; }
else if (key == "f12") { keycode = 70; }
else if (key == "print_screen") { keycode = 70; }
else if (key == "scroll_lock") { keycode = 71; }
else if (key == "pause") { keycode = 72; }
else if (key == "insert") { keycode = 73; }
else if (key == "home") { keycode = 74; }
else if (key == "page_up") { keycode = 75; }
else if (key == "delete") { keycode = 76; }
else if (key == "end") { keycode = 77; }
else if (key == "page_down") { keycode = 78; }
else if (key == "right_arrow") { keycode = 79; }
else if (key == "left_arrow") { keycode = 80; }
else if (key == "down_arrow") { keycode = 81; }
else if (key == "up_arrow") { keycode = 82; }
else if (key == "numlock" || key == "clear") { keycode = 83; }
//TODO: keypad and miscellaneous keys if you want them.
// modifier keys.
else if (key == "left_control") { keycode = 224; }
else if (key == "left_shift") { keycode = 225; }
else if (key == "left_alt") { keycode = 226; }
else if (key == "left_gui") { keycode = 227; }
else if (key == "right_control") { keycode = 228; }
else if (key == "right_shift") { keycode = 229; }
else if (key == "right_alt") { keycode = 230; }
else if (key == "right_gui") { keycode = 231; }
return keycode;
}
int getModifierMask(String keyname) {
return getModifierMask(getKeycode(keyname));
}
int getModifierMask(int keycode) { // return value of 0 means key is not a modifier.
int modifiermask = 0;
// NOTE: these are not the usage keycodes like for other keys, but rather the bit masks.
if (keycode == 224) { modifiermask = B00000001; } // left ctrl
else if (keycode == 225) { modifiermask = B00000010; } // left shift
else if (keycode == 226) { modifiermask = B00000100; } // left alt
else if (keycode == 227) { modifiermask = B00001000; } // left gui
else if (keycode == 228) { modifiermask = B00010000; } // right ctrl
else if (keycode == 229) { modifiermask = B00100000; } // right shift
else if (keycode == 230) { modifiermask = B01000000; } // right alt
else if (keycode == 231) { modifiermask = B10000000; } // right gui
return modifiermask;
}
شرح الكود البرمجي
في هذا السطر نستدعي مكتبة قارئ البطاقة RFID ومكتبة الاتصال المتزامن.
#include <SPI.h>
#include <MFRC522.h> // RFID library
هذه الأسطر توضح منافذ الاردوينو التي ستستخدمها للربط في هذا المشروع.
#define SS_PIN 10 //RX slave select
#define RST_PIN 9
بعد ذلك أعلنا عن المتغيرات اللازمة مثل المتغيرات الخاصة بقارئ البطاقة RFID.
int gled = 7; // optional
int rled = 4;// optional
MFRC522 mfrc522(SS_PIN, RST_PIN); // Create MFRC522 instance.
هذه الأسطر حساسة ومهمة.
السطر الأول: اتركه كما هو عليه فارغ.
السطر الثاني: اكتب كلمة المرور التي تستخدمها عند تسجيل دخولك لنظام ويندوز (كن منتبهًا لحالة الأحرف).
السطر الثالث: اكتب رقم ID للبطاقة.
String card_ID=""; //
String password="12345986" ; // Change It To Your Windows / fb / any Account's Password
String rfid="215177152200";// UID (unique Id Code Of Your Rfid Tag)
في الدالة ()setup يتم انشاء جسر تواصل تسلسلي بين الحاسوب وقارئ البطاقة وتهيئة قارئ البطاقة لتسجيل القيم.
void setup() {
Serial.begin(9600); // Initialize serial communications with the PC
SPI.begin(); // Init SPI bus
mfrc522.PCD_Init(); // Init MFRC522 card
pinMode(gled,OUTPUT);
pinMode(rled,OUTPUT);
في الدالة ()loop يستبدل الرمز السابق للبطاقة بالرمز الجديد (رمز تسجيل الدخول لنظام ويندوز).
تتم قراءة البيانات من قارئ البطاقة ويتم ارسالها إلى الاردوينو لمعالجة البيانات المدخلة.
سيختبر القارئ كل بطاقة يتم توجيهها له وسيمنع أي محاولات لدخول النظام غير مصرحة.
وسيعطي الصلاحية فقط لحامل البطاقة التي تحمل كلمة المرور لنظام ويندوز.
void loop() {}
يمكنك الآن رفع الكود البرمجي على لوحة الاردوينو بعد تعيين رمز البطاقة وكلمة المرور لنظام ويندوز.
وضع (DFU)
هو اختصار لكلمة (Device Firmware Update).
عند وضع الاردوينو بوضع DFU فلا يمكنك استخدام المنفذ التسلسلي USB مرة أخرى مع برنامج Arduino IDE.
وهنا يمكنك عمل ترقية باستخدام برامج أخرى مثل Flip.
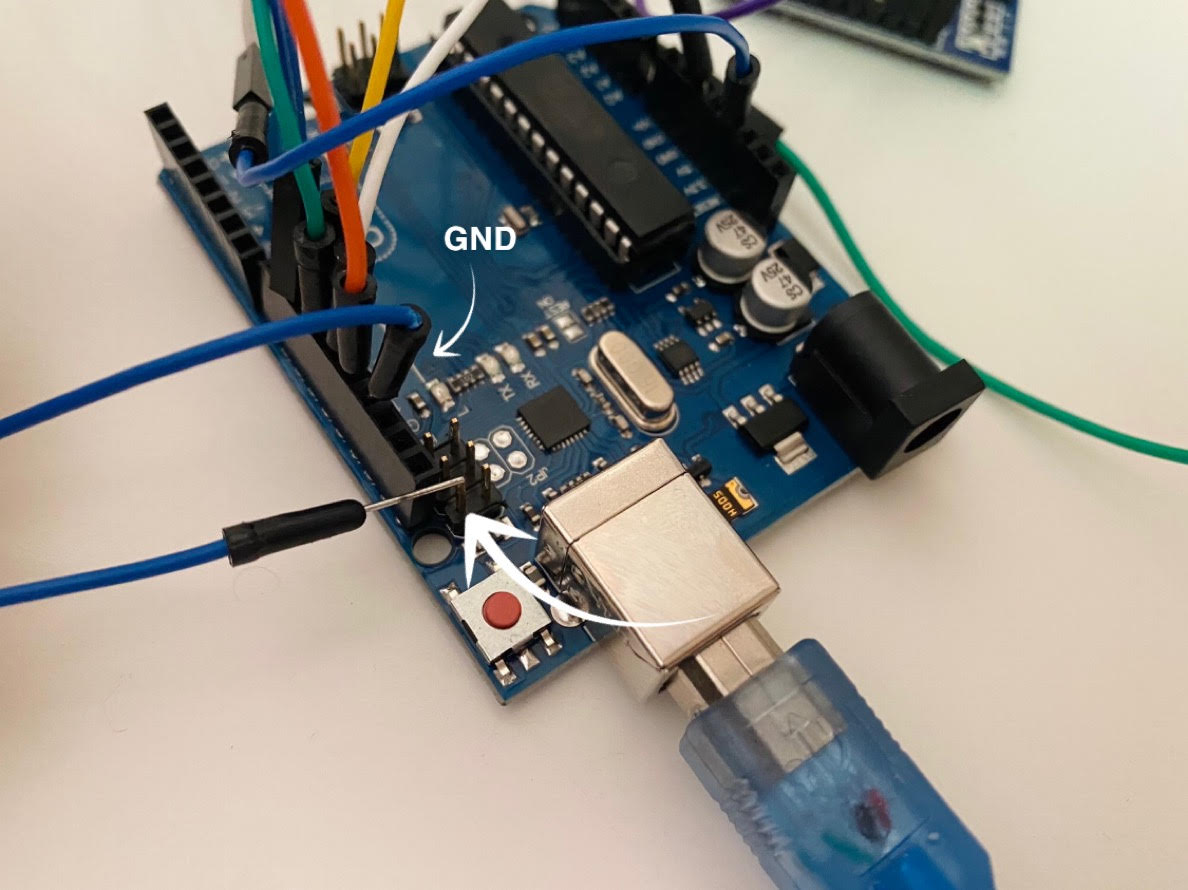
بعد رفع الكود البرمجي لنظام تسجيل الدخول لنظام ويندوز باستخدام الاردوينو و RFID.
وصل سلك من GND إلى الرأس المشار إليه بالسهم لمدة ثانية أو ثانيتين ستبدأ لوحة الاردوينو بالوميض أزل السلك بعد انتهاء الوميض.
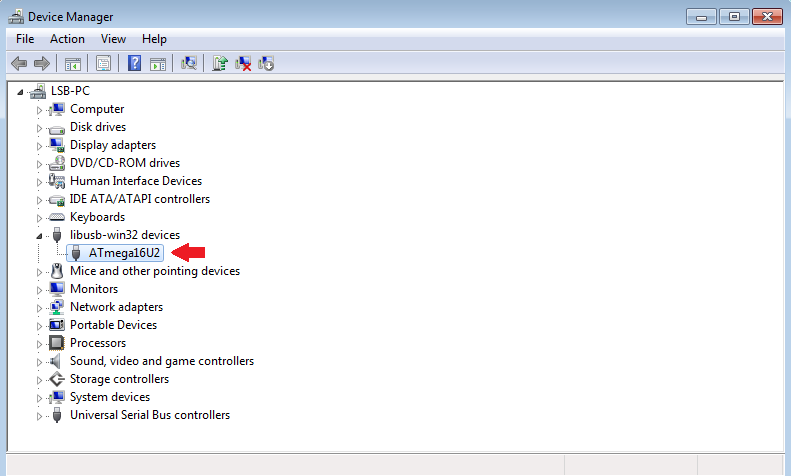
عند الذهاب للمسار التالي:
Control panel > Hardware and Sound > Device Manager
ستلاحظ وجود جهاز جديد بهذا الاسم.
يمكنك فصل سلك USB الموصل مع لوحة الاردوينو وإعادته مرة أخرى.
سيبدأ النظام بالعمل مباشرة يمكنك اختباره واختبار صحة خطواتك.
لا تنسَ فصل مصدر الطاقة بعد الانتهاء من استخدام النظام.